Installation
Create your application
Follow ReactNative Getting Started
You must follow the Section "Building Projects with Native Code" as we doesn't support expo.
Requesting your credentials
The AdsumReactNativeMap is hosted in a private npm registry, so you will need to contact us.
Once you have your npm authentication token, you'll need to create a .npmrc
file into your root project directory with the following content:
//registry.npmjs.org/:_authToken=YOUR_ADACTIVE_TOKEN
Where YOUR_ADACTIVE_TOKEN is the provided token.
Install
Add AdsumReactNativeMap to your App
We recommend using Yarn or npm for managing front-end dependencies. If you’re new to package managers, the Yarn documentation is a good place to get started.
To install AdsumReactNativeMap using Yarn, run:
yarn add @adactive/adsum-react-native-map@^5.0.0
To install AdsumReactNativeMap using npm, run:
npm install --save @adactive/adsum-react-native-map@^5.0.0
AdsumClientAPI
AdsumClientApi is a peer-dependency required to load Adsum Data over our REST API
Follow AdsumClientAPI installation steps
Don't forget React Native specific installation step
React Native Static Server
Follow react-native-static-server Getting Started
Assets
AdsumReactNativeMap uses assets that must be included in your project.
npx adsum-rn-map install:assets
Make sure to run this script every time you update the AdsumReactNativeMap to ship new asset versions.
We advice to put this command into your package.json as follow:
{
  "scripts": {
    "start": "npx adsum-rn-map install:assets && node node_modules/react-native/local-cli/cli.js start",
    "test": "jest"
  }
}
Get DeviceID
If you want to use the device configuration setup in the studio like camera calibration or device position you will need to retrieve the deviceId
Download the JSON configuration file as specified in studio documentation
You should have something like this:
{
    ...
    "map": {
      "deviceId": 323
    },
    "api": {
        "endpoint": "https://api.adsum.io",
        "site": 322,
        "username": "323-device",
        "key": "343169bf805f8abd5fa71a4f529594a654de6afbac70a2d867a8b458c526fb7d"
    },
    ...
}
As specified in AdsumClientApi Get API credentials section, you will find your API credentials under the api property.
Then logically, the device map configuration is under map property.
Integration
AdsumReactNative require a WebView component.
Let's change our App.js
import React from 'react';
import { StyleSheet, WebView } from 'react-native';
import { AdsumNativeMap } from '@adactive/adsum-react-native-map';
import { EntityManager } from '@adactive/adsum-client-api';

export default class App extends React.Component {
    constructor() {
        super();

        this.state = {
            ready: false,
        };
    }

    componentWillMount() {
        // Create an entityManager using the API credentials (see AdsumClientAPI documentation for more details)
        this.entityManager = new EntityManager({
            "endpoint": "https://api.adsum.io",
            "site": 322,
            "username": "323-device",
            "key": "343169bf805f8abd5fa71a4f529594a654de6afbac70a2d867a8b458c526fb7d"
        });

        // Create the Map instance
        this.adsumRnMap = new AdsumNativeMap({});

        this.start();
    }

    async start() {
        // Init the Map
        await this.adsumRnMap.init({
            entityManager: this.entityManager,
            deviceId: 323,
        });

        // Start the rendering
        await this.adsumRnMap.start();

        this.setState({ ready: true });
    }

    render() {
        // Render your map inside the Webview

        return (
            // Don't forget to add specific props to your WebView in order to let the map bind to it
            <WebView style={styles.webview} {...this.adsumRnMap.getWebViewProps()}>
            </WebView>
        );
    }
}

const styles = StyleSheet.create({
    webview: {
        flex: 1,
    },
});
You can find complete code here
Run
Android
Development
- Connect your device
- Launch application server
npm start - Run
adb reverse tcp:8081 tcp:8081in order to be able to access application server from your device - Run the application on Android Studio
Production
- Run
npx adsum-rn-map install:assets --target=android - Package your application using Android Studio
iOs
- Run
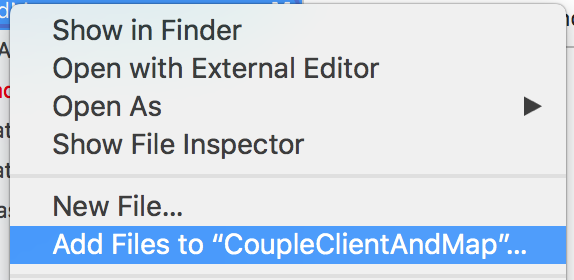
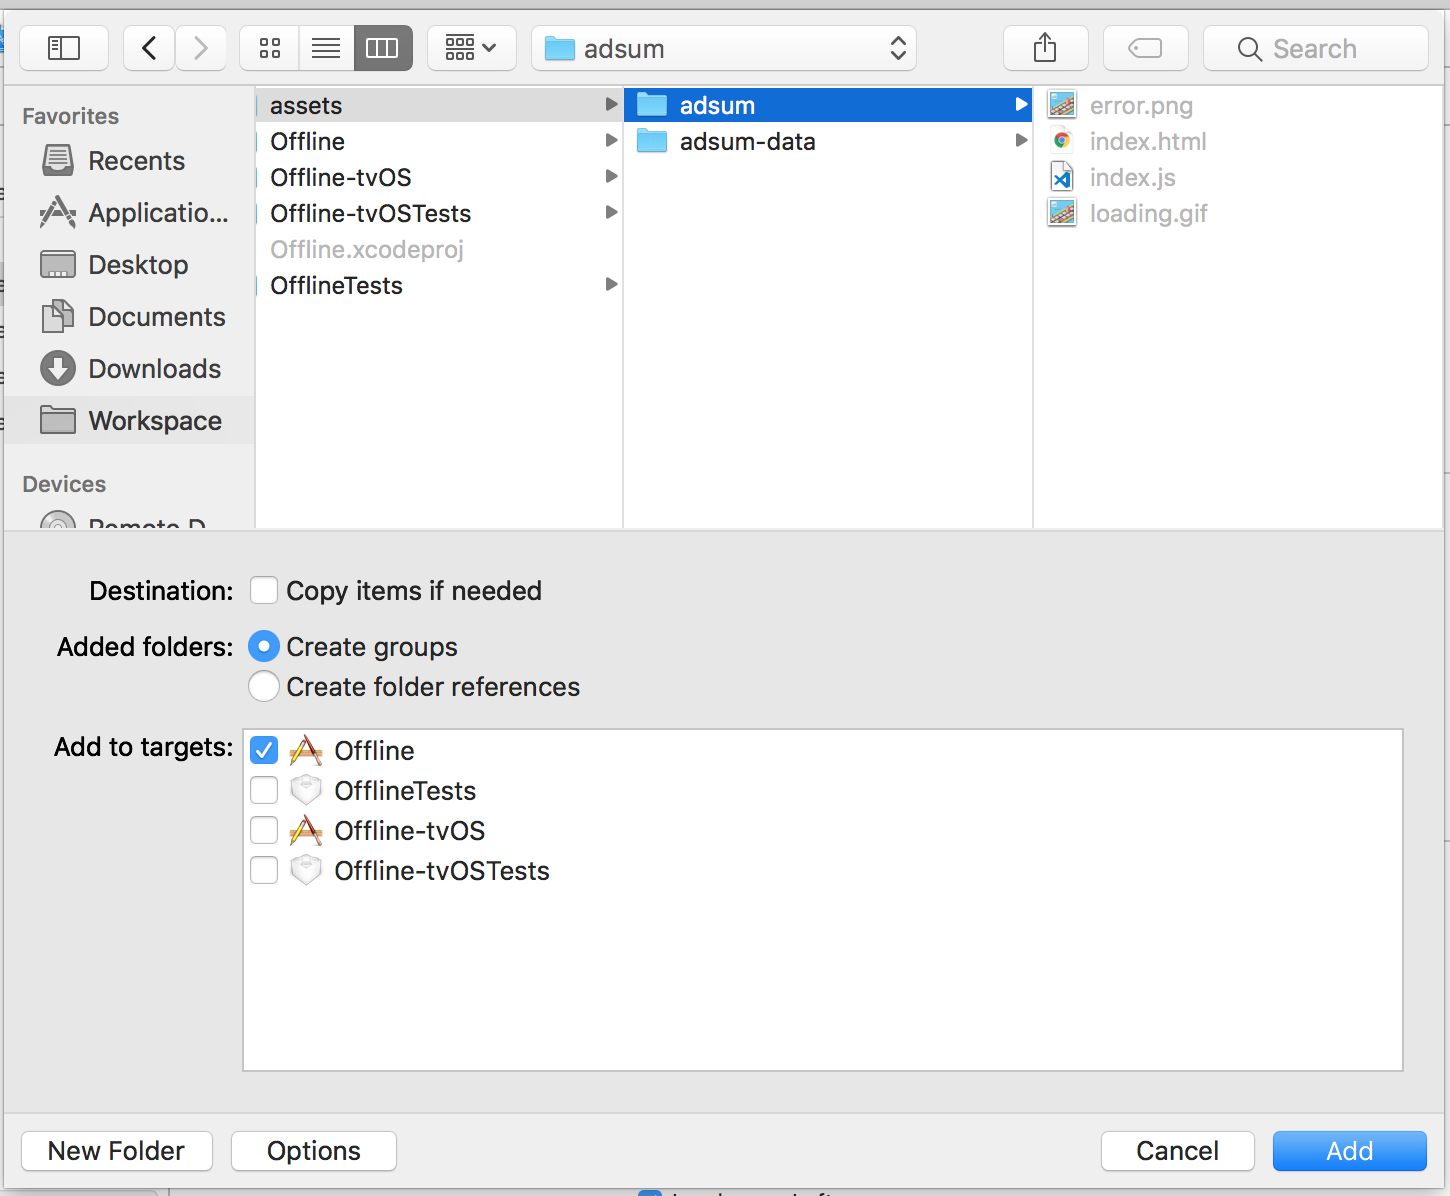
npx adsum-rn-map install:assets --target=ios - Add
ios/assetsfolder to your Xcode project- Right click on the projects
- Add files to "..."

- Create groups

- Run using Xcode
If you have the error
NSURLErrorDomain: The requested URL was not found on this server.it's because the webview is not able to access the assets, specifically theindex.htmlfile. Make sure to use "create groups" and not "create folder references".
